There are so many things that the program Microsoft Excel can do and most of us (including me) only stumble across its vast feature-set when we can’t do something and are forced to look it up. Well, that was me last week.
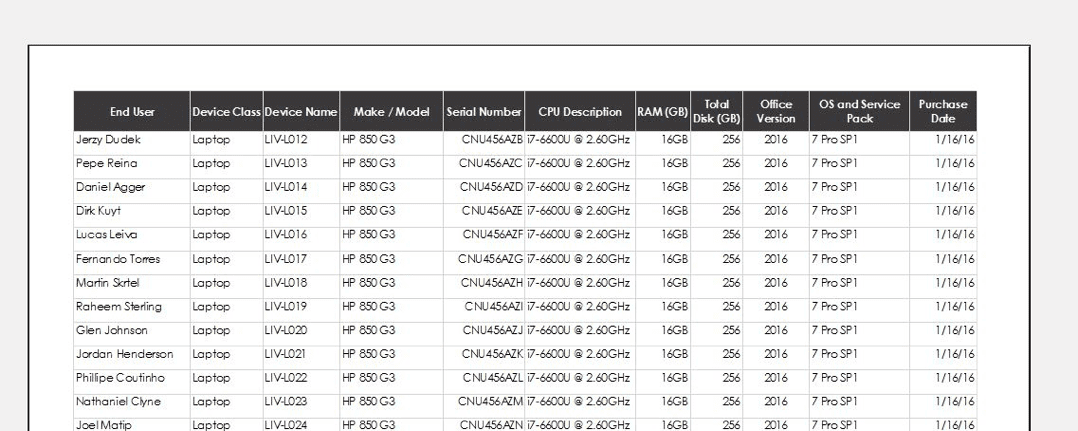
I wanted to print out a computer inventory spreadsheet for a client meeting and due to the number of entries, it was going to print across 2 pages. The issue I had was that the column titles didn’t print on anything but the first page. So, the second page had the remaining data but with no title heading for reference. My print job looked like this:
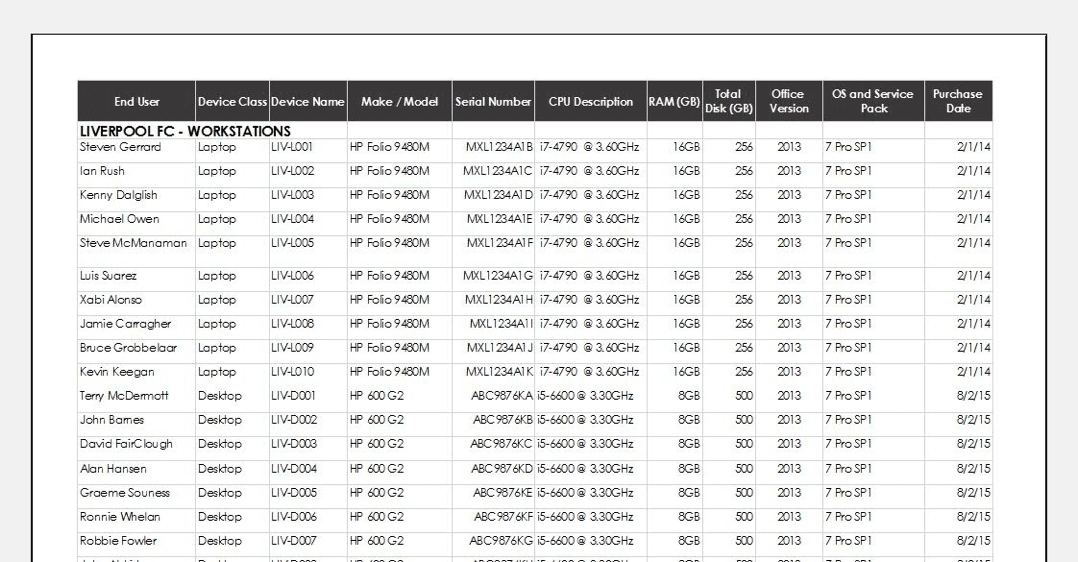
Page 1:
 Page 2:

There is an easy fix that applies to Office versions 2010 – 2016. If you’re running 2007 or earlier I’m not sure if the same instructions would apply. And besides, if you are, don’t you think it’s time to upgrade?!?
Here’s what to do:
In the spreadsheet you are working in click on the ‘Page Layout’ tab and then click on ‘Print Titles.’
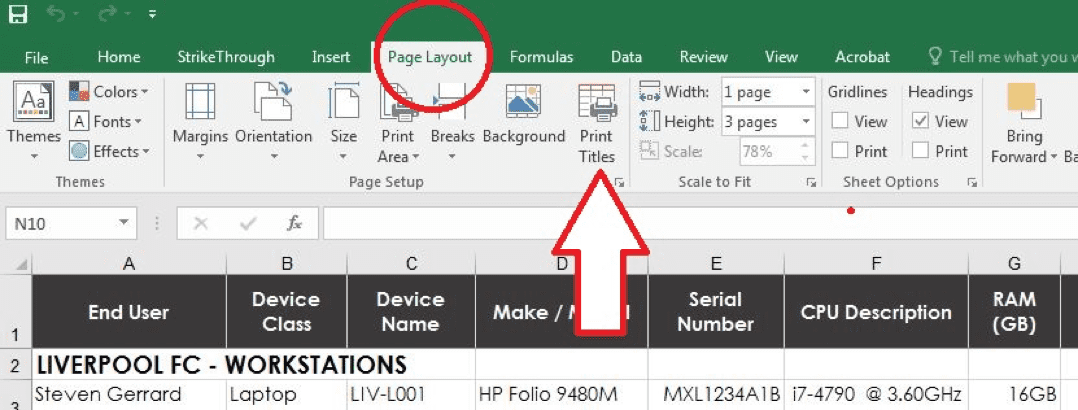
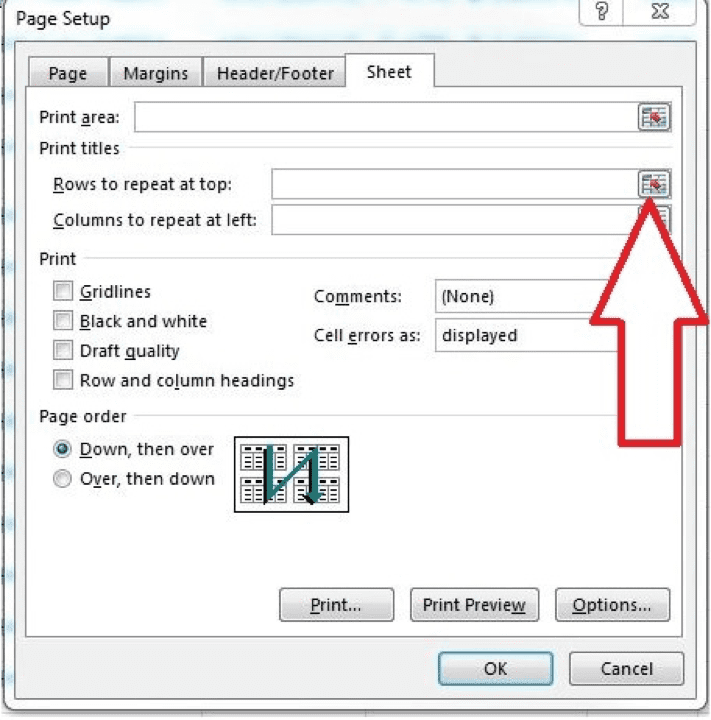
The ‘Page Setup’ box will pop up. Click on the mini spreadsheet icon and your mouse pointer will be taken back to the active spreadsheet. Simply click anywhere on row 1 (the title row) and Excel will automatically select that entire row. Then click the red ‘x’ on the active pop up to be taken back to the original ‘Page Setup’ box and you’ll now notice a set of values: ($1:$1) in the box called ‘Rows to repeat at top.’
Click on the OK button at the bottom to keep this setting.
Now when you go to print, these titles will display on every page of the spreadsheet (page 2 shown now has the title row visible).